This guide explains how to record student presentations on campus, where this is a necessary feature of your course design. If the learning outcomes for your module do not require that students deliver their presentation in person, please consider asking your students to:
- Present to you via Zoom (which can be easily recorded).
- Record their presentations in advance, and share the video with you.
Before you begin:
- To capture student presentations, our recommendation is to use your university laptop, and to record using Panopto.
- If you haven't done so already, you can download the Panopto app from AppsAnywhere, or use the web version.
- To record your voice, IS and DCQE have purchased a large batch of wireless USB lapel microphones (powered by AA batteries), and they are available on long-term loan from IS (please complete this IS form to arrange a collection date and time from St. Andrew's Court. You will need to select "yes" when asked "Do you know what specific peripheral(s) are required?" then select the "USB Lapel/Lavalier Microphone (Lecturing, Academics Only)).
- The BaL Digital team is happy to show staff how to use a wireless microphone if required, and to can help to ensure your laptop setup is “ready to record” for live sessions. This will have to be done ahead of time and not on the day of recording.
What if I don't have a laptop or can't take one to the teaching rooms with me?
We encourage anyone who can use a laptop to do so, as it will make this process much easier. However, we appreciate this may not always be possible. If you are unable to use a university laptop or have any additional questions, please get in touch with the BAL Digital team and we will work to help you find a solution.
Can I use my own device?
You can also create video footage using a personal phone, tablet, or other devices, with the Panopto app, (available from the Apple App Store or Google Play Store).
The recording process:
To begin recording:
- Switch on your laptop.
- Download Panopto if you don’t already have it (available from AppsAnywhere, or use the web version).
- Plug in your USB webcam, and ensure it is pointing at your subject (i.e. the student presenters). Note that this will capture video and audio, but the audio quality and clarity will decrease as you get further away from the subject.
- Open Panopto and sign in using your university credentials. Once you’re logged in, you should see a screen like this:
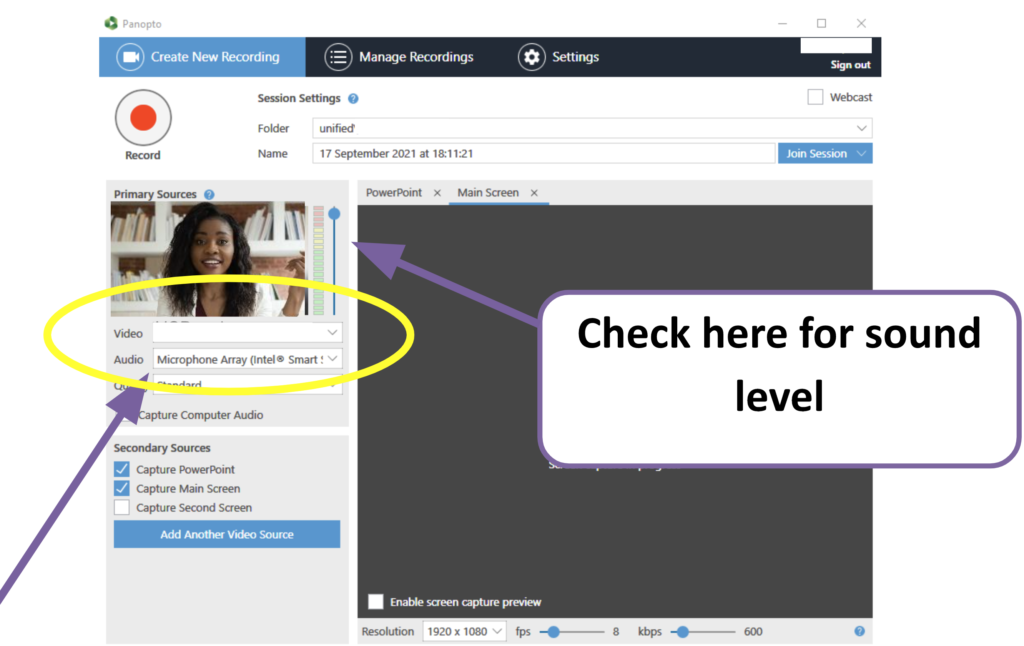
- Ensure you're able to see and hear what the webcam is capturing, in the small images (top left) and that the sound meter next to it is picking up audio.
- Begin recording. When you’ve finished, simply press stop. The recording will be available in your cloud-based Panopto folder. You can now share or move this.
We recommend doing a test recording at home, before coming to campus to teach for the first time. More guidance on using Panopto can be found on this DCQE website, or for further assistance, contact BAL Digital.