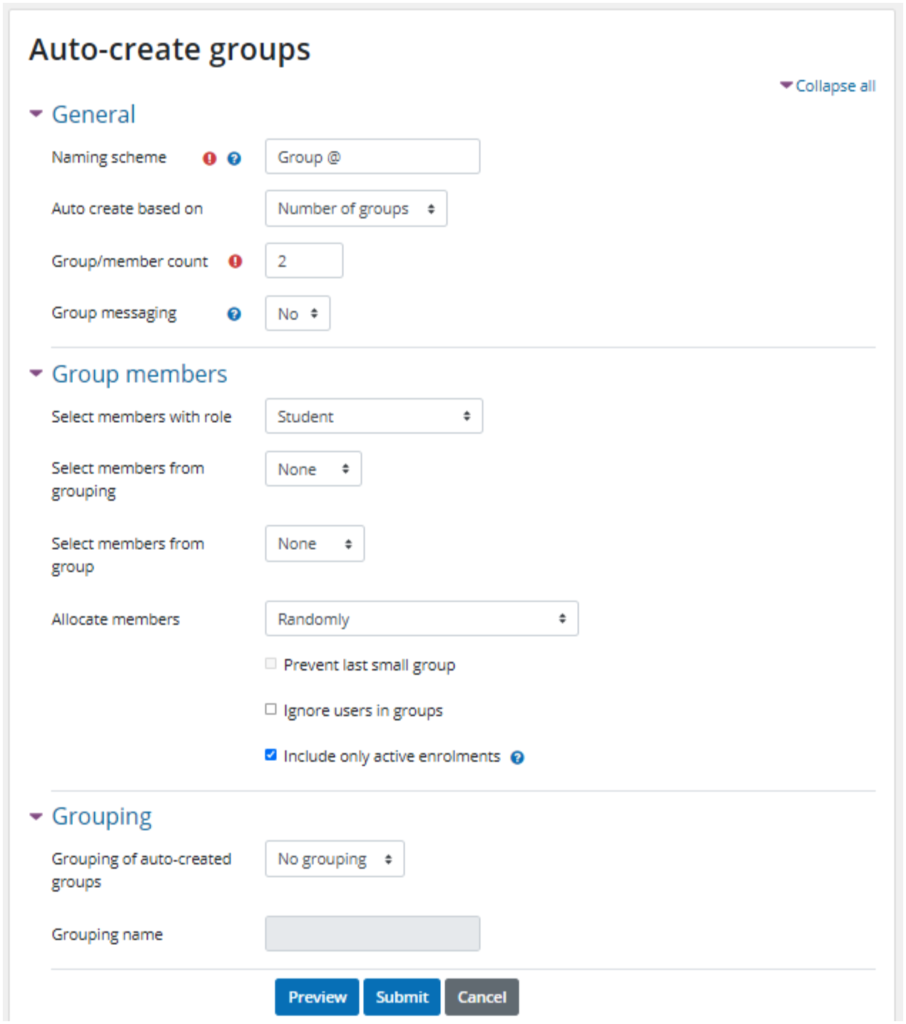
You can also auto-create groups based on the number of groups you need, or the number of members per group you need. All students enrolled on the site will be assigned randomly and automatically into groups based on your decision. To automatically create groups, go to the “Groups” page and click the “Auto-create groups” button.
- On the Auto-create groups page:
- Under “General”
- Enter a “Naming scheme”
- Group @ will create groups named Group A, Group B, Group C . . .
- Group # will create groups named Group 1, Group 2, Group 3 . . .
- For “Auto create based on”, select whether you will create groups based on the number of groups or the number of members per group, then enter that number in the “Group/member count” field.
- For “Group/member count”, enter the number of members you want in each group.
- Enter a “Naming scheme”
- Under “Group members”
- Select which role (usually “Student”) and/or the cohort/grouping/group you want to select from.
- Select how you want Moodle to “Allocate members” to the groups, if you don’t want the default random selection. If this is to be a self-enrolment grouping, select “No allocation”.
- If you specify “Members per group” and select “Prevent last small group”, members will be added to existing groups rather than a new group being created with fewer than the specified number of members.
- select if you want to “Ignore users (already) in groups”.
- Under “Grouping”
- For “Grouping of auto-created groups”, either leave as “No grouping” or specify whether to add the groups to a new or an existing grouping.
- If you select “New grouping”, also complete the “Grouping name” field.
- Click “Preview”. The groups display in a table. For auto-allocated groups, the Group members also display; for non-allocated groups, this column is empty.

- Under “General”